The standard violin bridge has evolved over many centuries from what would to our modern eyes be seemingly rather crude pieces of wood beneath the strings, finally towards very elegant, yet sometimes poorly understood parts of a bowed instrument. Luthiers generally order bridge “blanks” from a tool supplier, and refine these during setup, fitting feet, and tuning the hearts, kidneys, ankles, waist, to be a final finished product.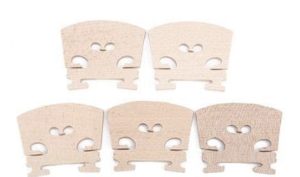 A very finely made instrument will sound terrible if the bridge is not right. The problem with this approach is that modern, factory bridge blanks are often made from kiln-dried, or even chemically treated wood. In the past, more organic solutions such as animal urine were used to ammoniate and hence harden the wood stock, the theory being that this would be easier to cut, and produce a clearer sound.
While the general shape of the violin bridge has over the years become standard, the situation is quite different for violoncello bridges.
Thoughout history, different regions produced variations in shape, waist height, position of hearts and kidneys. All of these variation can make a profound difference in sound. This has been an area of fairly wild expiramentation in the past. Making an experimental bridge only takes a few days, so makers were willing to do absolutely crazy ideas. If you have a cup of coffee already made and some spair time, there is an online archive of historical bridges here.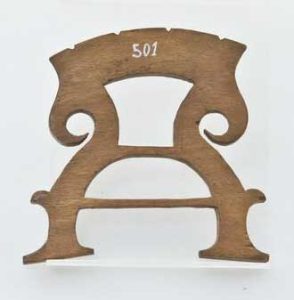
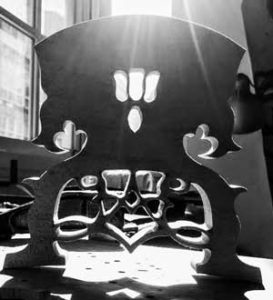
Let’s try and get a very basic understanding about the function of the bridge. 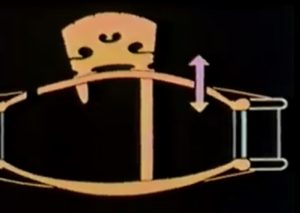 A rocking motion is formed by the vibration of the strings, which in turn forces air and sound outwards through the soundholes. The feet are supported by both bass bar and soundpost, otherwise, the top would collapse and shatter from the pressure of the strings. Usually, by “tuning” the heart and kidneys, the maker searches for optimum sound.
Having a commission for a baroque violoncello after Celoniato, and in preparation for arrival of the musician in the Vienna workshop, I decided to cut a minimum of three different bridges. Two of the designs were taken from historical violoncello bridges, the final being of my own design. This is to insure to that maximum sound potential is reached for this instrument. The historical designs were also chosen for a reason. Both my own and the others were based upon input from the customer and moving towards a portrait of tone which began on the very first day of the creation of the cello.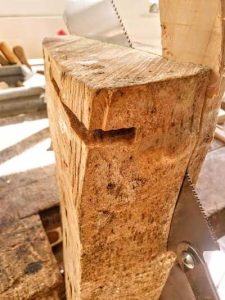 I begin with a stock of bridge wood aged over 20 years in my workshop. One can see the patina of age and know from tap testing that this wood stock was ready long ago. The more time however, the better. Wood looses moisture over time. When you examine the rays of the wood, one can get a sense of the density needed to be a violoncello bridge
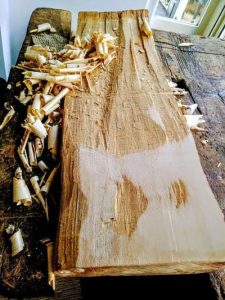
Once my surface is planed and flat, I can begin with probably the most fanciful of the three bridges, creating a stencil from a photographic image.
I begin by trimming away the excess wood and hollowing out the “hat” shape, and the connecting bar to the ankles and feet.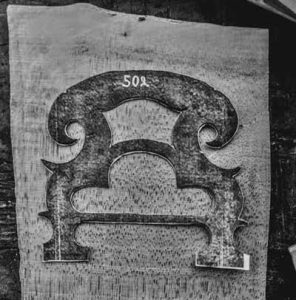 This bar essentially stops the pressure of the strings from expanding the bridge feet when on the instrument, and also acts as a (perhaps!) desirable damping mechanism.
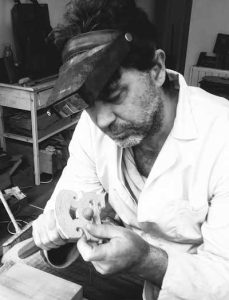
Every musician has probably at one point in their lives used a wooden mute, which also vary in shape, design, and construction. The metaphor for a mute is an apt one in understanding why some bridges can deliver a “sweeter” sound. This is something you can try at home on your instrument. Take a wooden clothes pin, and clamp it to your violin bridge carefully. Now play. Does it sound terrible? Well yes! Now adjust the pin so that it is in different places, further out, or inwards, on both the bass and treble sides. The difference is sound is quite dramatic. Keep in mind, this is merely a simple metaphor to understand how weight ratios effect sound. It is absolutely crucial that your luthier understands this when your ordering an instrument, otherwise it is quite possible that the full potential of the instrument is lost.
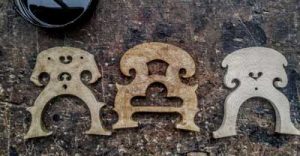
Three baroque violoncello bridges. On the left, my own personal design.
Note here that the final trimming of the feet, and essentially most of the work is done over a 3-5 day period with the musician present, responding to their demands, suggestions, removing wood, testing, playing, etc. Although this is of course time consuming, I have found it essential in delivering the exact sound which was communicated to me by the performer beforehand.
In the end, my own design worked the best. This took several days to figure out, but in any case was hardly a waste of time. This is why not only in the beginning the consultation period of discussing tone, corpus and string length, arching, stringing choice, is essential. I make a rather bold requirement for every musician ordering a violoncello from me; a minimum of five days must be reserved for setup!!!!
Endless solutions and avenues of sound can be found during these final days of tinkering. the question is, where do we want to go? The possibilities are endless.